Saturday, October 31, 2015

We Wish You A......

Happy Halloween!

Before we begin our festivities here with the kiddos, I wanted to share a card with you. 


This card was inspired by MFT's Sketch and Color Challenges.  

I cut a poinsettia with MFT Cranberry Cocktail, Whip Cream, and Factory Green card stock with my Cameo.  After I cut and assembled the layers, I added Versamark and sparkling embossing powder.  


I cut a frame from After Midnight and Whip Cream card stock with MFT's Pierced Rectangle Frames


The sentiment is from MFT's Merry Messages Stamp Set.  I cut the sentiment for the stripes in the sketch.  I stamped the front with MFT's Cranberry Cocktail hybrid ink, and highlighted it with a Spica clear glitter pen.  

The inside sentiment was stamped in Versamark and heat embossed with white detailed embossing powder.  


To mat the inside and sentiment, I used the reverse pieces from the rectangle frames die cuts.  

Also, while looking for other inspiration and challenges, I found that Simon Says Stamp's Wednesday Challenge is Anything Goes.  So, of course, I am entering my card.   

Friday, October 30, 2015

Pumpkins...in 3D Play

Happy Friday!

Today is a new 3D challenge over at Cardz TV.  

The DT challenge is to create a project using pumpkins.


I struggled with this challenge...I must say.  For some reason, I am so ready for Christmas, hot cocoa, and snow that pumpkins just do not get my creativity flowing these days.  

While trying to come up with a project idea, I came across this post.  And it was just what I was looking for.  I have three small children that we homeschool.  And since they do not get exposed to the silliness that a group of kids their age have, we are silly with them.  Fun, right?  And these 'cootie catchers' were perfect for using with CardzTV stamps.  Just perfect!


To help with the stamping, I used my MISTI.   All I had to do was position all my stamps once and then ink and stamp away.  


After I finished my pictures and editing, our 5 year old (the baby) grabbed them and took them to this brother and sister, and they are currently playing with them.  Makes a Momma feel good.  :-)

Monday, October 26, 2015

Santa...Define Good.....

Happy Monday!

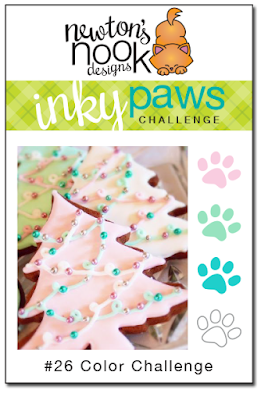
Did you realize Christmas is two months from yesterday?  And I am SO in the mood for Christmas shopping and decorating...and the Inky Paws Challenge is the perfect enabler.  

The challenge is a color challenge....
#inkypaws Challenge 26 - Color Challenge | Newton's Nook Designs
Here is what I came up with...
When I saw the colors for the challenge, I immediately thought of Bo Bunny's Candy Cane paper collection.  It is perfect for this challenge...the colors and theme.  

I used Newton from Newton's Curious Christmas.  Newton and the tree were stamped on Neenah Solar White card stock with Memento Tuxedo Black ink.  To get the placement just right, I used my MISTI tool.  The image was then colored with Copics.  For the ornaments, I stamped the smallest snowflake from the stamp set in Memento Lux Wedding Dress Pigment Ink and heat embossed with Simon Says Stamp Detail White embossing powder.  
I added some embossed lines to help frame Newton.  The sentiment was stamped in Versafine Onyx Black in and clear heat embossed.  I love the crispness that the Versafine and clear embossing give.  
The inside of the card was finished off with Newton stamped in Simon Says Stamp Mint ink and a sentiment.  

Sunday, October 25, 2015

Holiday Cheer

Happy Sunday!!

It's a beautiful fall day here...and I've been making Christmas cards.   Great huh?  Our city Christmas tree lighting and parade is only a few weeks way.  

One of my cards was inspired by WPlus9's Throwback Thursday Challenge.


My card was inspired specifically by Maureen's card.


The stamp set showcased in the challenge is the Fair Isle Backgrounds.  I do not own it (yet)...but I have a retired cable knit background stamp from Peachy Keen Stamps.  So, I combined it with WPlus9's Holiday Cheer stamp set.  

Since I was working with a background stamp and not borders, I used masking to create the card front.  


I stamped the gloves first in Bo Peep and Fairy Dust inks on white card stock...masked them off with post-it tape, and then stamped the background stamp.  

To give the panel a finished edge, I used the gift card layers die to add a stitched border.  


I embossed the front sentiment with sparkling clear embossing powder.


The panel was added to a top folding coal mine card base.  The inside of the card was lined with a Dove Grey panel.  


The card base and panel were stamped with the cable knit background stamp.  A few gloves embossed with sparkling embossing powder finishes it off.  


Friday, October 23, 2015

Batty for You

Click HERE for Miss Kate Cuttables Post.  

............................................................................................................

Happy Friday!

I wanted to pop in and share a card for the MFT Sketch Challenge.  

I created a top folding A2 card base with MFT smooth white card stock.  I embossed it with Blueprints 21.  Then masked of an area to create the semi-circle.  I inked it with distress ink.  


I stamped the image from Batty about You on bristol watercolor paper and colored her with Zig Clean Color real brush pens.  
Once dry, I added clear Wink of Stella and Glossy Accents to the charcoal portions.  


The inside was inked with Grout Gray ink and Concentric Circle Grid Stencil.  

The sentiment was stamped in Black Licorice Hybrid ink.  


Tricks or Treat...Miss Kate Cuttables

Happy Friday!

It's Tonya, from Paper of Many Colors, and  I'm here with today's Miss Kate Cuttables blog post.   


First, Today's Freebie.......
 (You can get today's freebie at the store HERE.) 

Christmas Mrs. Claus SVG scrapbook cut file cute clipart files for silhouette cricut pazzles free svgs free svg cuts cute cut files

And now my creations:
I created treat bags for a few little ones in my family.  We live in another state than they do, so I try to mail small packages to them.  
I used Miss Kate's Cute Halloween Monsters files and the Print-N-Cut feature with my Silhouette Cameo.  I love this feature.  It's great to give to little ones and not worry about small pieces of paper ending up in one of their mouths.  
For the toppers, I used a DCWV mat stack and folded them in half.  The treat bags are from Joanns.  I added the monsters with foam tape.  The sentiment is from MFT's Witch Way is the Candy stamp set.  

The cutting files I used can be found HERE on the Miss Kate Cuttables' site.

Cute Halloween Monsters Witch Pumpkin Spider SVG scrapbook cut file cute clipart files for silhouette cricut pazzles free svgs free svg cuts cute cut filesCute Halloween Monsters Ghost Vampire Frankenstein SVG scrapbook cut file cute clipart files for silhouette cricut pazzles free svgs free svg cuts cute cut files


Thursday, October 22, 2015

I Spy...With My Little Eye....A Tiny Monster

Happy Thursday!

Halloween is just around the corner and the kids are getting realy excited.  This past weekend we attended the Zooloween Boo (Our small zoo's Halloween for the kids).  And next week is the downtown Trick-or-Treating.  Then of course, Halloween itself.  EEK!   So this week, I'll be getting all my Halloween packages out to family out-of-state.  

Perfect timing, in my schedule, for the Lawnscaping Challenge - Too Cute to Spook.  


I created a cute little shaker card.....Can you spot the little monster? 


 Isn't this card just adorable?!?!?!?  

I used Lawn Fawn's Monster Mash, Booyah, and Flirty Frames for the images.  The focal panel was created by stamping the Flirty Frames on MFT Smooth White card stock.  I masked the frames off and inked the panel with Tim Holtz Batground Stencil and Lawn Fawn Soot ink.   After the inking was finished, I sprayed some Dylusions white spray and Perfect Pearls Mist over the stencil.  


I stamped the monsters and colored with Copics.  I cut them out and adhered them to the card base so that they look as if they are peeking and playing in the frames.


I added a layer of 3M foam tape.  The shaker bits are Pretty Pink Posh Silver Confetti, some hearts stamped in Lawn Fawn Lobster ink, one party hat, and a tiny monster to peek out.  


I stenciled the inside of the card to match the front panel.  The sentiment was stamped in Versafine Onyx Black ink and embossed with glittery clear embossing powder.  


I added a cute monster for some added fun.  


Monday, October 19, 2015

Fall Colors

Happy Monday!   

It's time to get the house ready for the week with laundry and meal planning.  

But before I start all that...I wanted share with you a card I created for MFT's Color Challenge.  


I had a hard time with this challenge.  My first creation was a disaster...a real disaster.   My second attempt just wasn't coming together.  It wasn't until I decided to use the colors as a plaid pattern that my card finally came together.  I used MFT dye inks (in all the colors) with Simon Say Stamp Basic Stripes stamp set to create the back panel. 


I used MFT's Blueprints 22 as my starting point to the card layout.  I also used the Fall Foliage stamp set and coordinating dies to add to the layout.  


Foam tape was added to create a bit of dimension with the leaves and foliage.  


I added clear Wink of Stella and some loose glitter for fun.  


The inside of the card was finished with a bit of stamping.  


Friday, October 16, 2015

MFT Sketch - Merry Christmas..

Happy Friday!!!

I am sharing my MFT's sketch challenge card.  

Since seeing the Stamp of Approval quarterly box release, I have been in the Christmas mood.  I know..I know...a bit early..but what can ya do?  When you feel it.....you feel it.   


I used MFT's Snowflake Fusion cover up and Smooth White card stock to emboss the main panel.  


After embossing I cut a circle out of the panel to showcase the image.  I stamped the image on Copic Xpress cardstock and colored with Copic markers, clear Wink of Stella, and a white Jelly Roll pen.  

To frame the image, I used the same circle die from the panel and a coordinating pinking edge die to create a circle frame.  I highlighted the frame with Peacock Stickles.  


I cut the panel and the Copic card stock with Blueprints 21.  The banner sentiment was cut from Berrylicous card stock and the same blueprints as the panel.  I stamped the sentiment with an Amy R stamp set, Versafine Black Onyx ink, and my Misti tool.  (I tried using a stamp positioner...but I couldn't.  Each stamping came out crooked.)  I also clear heat embossed the sentiment to make it pop a bit more.  


To adhere to the sketch, I added Pretty Pink Posh Clear Sparkling Sequins to represent the layered panel.  


I stamped the image on the inside of the card with Sno Cone dye ink, to match the base card.  I stamped a sentiment from the image set with Versafine Onyx Black ink.  

Cardz TV Treats

Happy Friday!

Today is a new 3D challenge over at Cardz TV.  

The DT challenge is to create a Treat Holder.  


I created a group of treat holders.  I have few grandchildren and a great niece who live in another state that I love dearly...and I thought I could send them a small package for the holiday.  

My treat holders were created from 4.5 square sheets of patterned paper.  The tags were created using my Silhouette Cameo, Silhouette software, Versafine Onyx black ink, and Cardz TV 'Trick or Treat' and 'Oct 31' stamp sets.